Work Day 27th October 2018

This week there is a photographic feast for you!  I am heading up with three photographs that a friend of ours, Steve Harrison, took for us to use, some great drama in the last one and following up with a collection by Pete Harry as he experiments with his new camera.
IMG_0010_edited-1 wmr.jpg

IMG_0055_edited-1 wmr.jpg

IMG_0007_edited-1 wmr.jpg

Mike S.

…… and so to Pete’s work blog:

It was a cold day on Saturday so I kept the hangar doors closed, a bit gloomy but used the spot lights for painting the T86 roof decking, as I did last Saturday.

IMG_1349 wm.jpg

All decking sections now all have a first coat on the underside. Next Saturday I’ll apply a second coat to the underside of the decking. I’ve also sourced some anti slip paint which is used on boat decks. I’ll give it a go on the top surface of the decking but I suspect we’ll still need sand adding, the specialist stuff that Pete M has donated.

I ran the Sim all afternoon without any glitches, probably because I had the fan heater running all morning to warm it through – condensation is our big enemy at this time of year.

Had a general tidy up in the LCP as on Nov 10th we have a visitor, my old Eng O from 25 Sqn, C Flt at Laarbruch. It’ll be good to meet up again, it’s been a while! I’ll tidy up the T86 next Saturday.

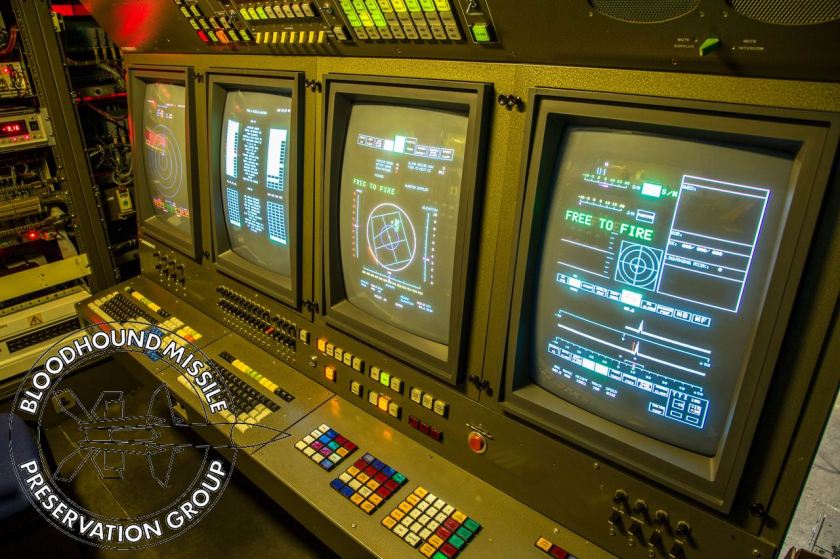
I now have a new camera, if anyone is interested it’s a Canon G7X Mark II and here are some photos from Saturday when I was giving it a test run. I like the photo of the working environment around the LCP and T86, the steps are there as I was trying to determine the thread size on the studs for the roof decking securing plates, possibly M10 or more likely 7/16 UNC. All photos shot on the ‘Auto’ setting, I’m no camera expert.

IMG_1379 wm.jpg

IMG_1365 wm.jpg

IMG_1372 wm.jpg


IMG_1353 wm.jpg

IMG_1356 wm.jpg

Pete H

Work Day 20th October 2018

Refurbishing the T86 pedestal covers
Years and weather have taken a toll on the pedestal covers but on the up side they are made up of alloy, fibreglass, rubber sheet and stainless steel catches. A ‘stack’ of covers is shown below.

T86 Pedestal Cover 3 wm.jpg

These covers are resistant to the usual problems of corrosion but they still have their problems that need to be fixed. A series of photographs illustrate the challenges ….

….  cracking and crazing of the rubber sheet cover (using space to show off our logo!),

T86 Pedestal Cover 2 wm.jpg

…..  rubber sheet becoming separated from the alloy sheet and wasted sealant around the catch screws,

T86 Pedestal Cover 4 wm.jpg

…. paintwork and seals on the inside of covers  and stiff or locked catches.

T86 Pedestal Cover 1 wm.jpg

For a ‘proper’ refurbishment all the covers need new rubber sheet applied but for now rubberised paint will be used to hopefully seal the crazing and cracks and buy time as there are enough other high priority tasks.

Securing Plates and Catches

The securing plates for the T86 roof decking are being refurbished in the usual way, remove old paint and corrosion, treat corrosion, prime and top coat.

T86 Decking Plates wm.jpg

The five cover securing clips, two sorts are involved (see image) were there replacements made during the refurbishment of this radar at Ferranti in the mis 80’s? Who knows, definitely not all from the same manufacturing batch.

T86 RF Rx Clips wm.jpg

The same applies to the catches from the RF receiver cover but in this case paint is removed with paint stripper and then primed.

T86 Primed fastenings wm.jpg

Pete H.


Work Day 13th October 2018

T86 Radar
Following the refurbishment of all the chiller and air conditioner covers they were refitted to the cabin. A time consuming and not a straight forward task for Pete M and Pete J. The standard of work carried out on the covers can be seen in these two photos, first the chiller then the air conditioner.

T86 Chiller Covers Refit wm.jpg

T86 AC Covers Refit wm.jpg

Neil rewired the refurbished roof switch and replaced its cover so apart from anti slip tape being applied to the top of the roof switch that task is complete. This photo shows the roof switch in position behind the roof access ladder, complete with fitted Castel key.

T86 Roof Switch Refit wm.jpg

Neil also tested the functionality of the roof switch as it is an integral part of aerial brake operation. Here a photo shows the front cabin wall after work was completed on the roof switch and the refitting of the air conditioner covers.

T86 Cabin Front wm.jpg

Some tasks are simply time consuming and a good example is painting of the new wooden decking for the  cabin roof. The decking had previously been primed so it was time for a top coat. Ian tackled this job and while he spent all day on it, it will take several more days of effort to complete. The top of the decking will receive an anti-slip coating. The decking is looking smart even though it is only partly painted so far.

T86 Decking wm.jpg

Trailer light brackets were refitted. The challenge here was to work out which were front and which were rear as they are different! A quick reference to original photos sorted that problem out and as can be seen they look the part now.

T86 Trailer Lights Bracket Refit wm.jpg

Another one of these ‘smaller’ tasks was the refitting of the disperser bars to two of the launcher stalk aerial illumination waveguide horns, again after refurbishment in the following photo.

T86 WG Horn Disperser wm.jpg

This is what the stalk aerial on the launcher looks like.

Stalk aerial wm.jpg

When possible fittings are removed for refurbishment off site. An example was Neil removing the securing clips for the RF receiver cover on the aerial system. Duly removed the clips will now be refurbished. An accompanying photo shows an example of what takes place off site, in this case the removal of corrosion from a trailer light lens fitting.

T86 Trailer Lamp Fittings wm.jpg

Launch Control Post
The simulator was run up without any problems but did start creating errors during use. Reseating and cleaning edge connectors on several Argus 700 cards did the trick. The environment in the hangar does not help condensation on all metal surfaces was severe this Saturday.


Work Day 6th October 2018

Saturday was spent refurbishing the front of the two air conditioning units on the T86 Radar cabin and giving their surrounds a second top coat followed by rubbing down and repainting before covers are refitted. Two accompanying images show the results. For the eagle-eyed who may have noticed that a seal is missing from the bottom air conditioner; it requires replacement and will be completed once new ¼ round seals are purchased.

T86 Cabin Refurb AC 1 wm.jpg


T86 Cabin Refurb AC 2 wm.jpg

Pete H.

CHARGE Pixel Store Repair

Having successfuly repaired faults on two Misubishi CRT monitors from LCP spares the  opportunity presented itself to have a go at fixing a CHARGE Pixel Store card that went U/S a month or so ago.

CHARGE stands for Compact High-resolution Advanced Raster Graphics Equipment. It is the system in the LCP that produces the graphics for the four displays.  It was devised and developed by Ferranti design engineer Peter Don-Duncan specifically for the Argus 700. Each of the four displays has a Controller card  (first below) and two Pixel Store cards (second below).

CHARGE Display Controller wm.jpg


CHARGE Pixel Store wm

We do have the circuit diagrams but no test specifications or special-to-type test equipment so with the density of the boards it is easy to understand why repair is approached with some trepidation.

Looking at the faulty display for this Pixel Store,which would have swapped out by substitution in the LCP, the symptom was recognised as being similar to a fault we had seen a year or so ago – doubling up on the video.

Pixel Store Fault wm.jpg

After creating a document with a suit of reference logic patterns using a serviceable Pixel Store comparison was made with the U/S card. The previous fault had been a 7483 4-bit adder so testing focussed in this area; lo and behold replacing  IC 107 it as another of the same device type.

Here you can see part of 3rd Line Servicing – part of Peter H’s conservatory; he already has a spare bedroom but while ‘the boss’ is away ….   The display now shows a solid test display (although the monitor linearity now needs setting up) with no doubling.
Pixel Store 3rd Line Test Rig wm.jpg

Back to mechanical stuff next week!

Work Day 29th September 2018

In the previous blog an image was included of two light brackets from the T86 cabin in ‘as removed’ condition. Saturday saw these brackets refurbished and painted along with other items including the three Launcher Illuminator waveguide horns; very pleasing to see things going back together.
T86 Cabin Fittings wm.jpg

After a refurbishment off site it was time to re fit the handle to the T86 roof access ladder as shown in the accompanying photos. A detail is included of the lifting bar on the handle that illustrates the work carried out, in this case the original steel wood screws (what was left of them) are replaced with brass screws and sealant is used to fill any gaps between the metal lifting bar and the wooden handle.

Roof Access Hand Rail Fitted wm.jpg

Roof Access Hand Rail 3 wm.jpg

Further painting of the T86 chassis was carried out at the base of the cabin walls. At least the cabin is starting to look the part again. The photo below also shows the LCP under its dust covers and the T86 aerial cage can be seen tucked away behind the cabin on the right.

T86 wm.jpg

Pete H