Work Day 25th November 2017

LCP
It was a case of sorting out one of the ‘I need to get around to it’ jobs on Saturday and that was fitting rubber pads to the load bearing points on the LCP axles. The axles are a BMPG modification that enable the LCP to be moved short distances without the need for a crane and a low loader! The first photo shows an axle end in position, it was taken a while ago so illustrates the condition of the LCP before refurbishment began.

Axle Fitted wm.jpg

The second photo shows an axle end with the new pads fitted.

LCP Axle Rubber Pads wm.jpg
T86 Radar
Yet more of the same for a few weeks now on the T86, work continues on replacing the wooden floor under the pedestal. Hopefully next week will see the end of this job. Enough photos of this job have been provided previously.

Work Day 18th November 2017

LCP
The simulator was run up and remains serviceable. Ran for a couple of hours before shutting down.

T86
Last week the pedestal drive chain slipped when trying to raise the pedestal so this Saturday Neil re tensioned the chain and raising and lowering the pedestal now works a treat. Raising and lowering the pedestal has to be carried out manually, a task greatly improved with the acquisition of a ½” drive ‘speed brace’ courtesy of eBay and Dave for sourcing the correct size, square, socket. Accompanying photos show the drive chain and the speed brace in action.

Tx Pedestal Chain Drive wm.jpg

Tx Hand Crank Pedestal Gear Box wm.jpg

Pete H set to and completed the paint removal and rubbing down the aerial assembly’s Rx cover, a task started by Richard. A heat gun was used to remove the top coats which literally peeled away as shown in the accompanying photo.

T86 Rx Cover 1 wm.jpgThe The Rx cover now awaits priming and a top coat. As always it is the preparation for a repaint that takes time.

T86 Rx Cover 2 wm.jpg
With the pedestal raised once more it was back to replacing the floor in the rear of the cabin, a jigsaw of sections, hand crafted to fit. The accompanying photo shows the large centre floor section fitted. Removing the last remains of the original rotten plywood was also carried out ready for continuing the manufacturing and fitting of the new floor sections.

Tx Floor Rear of Cabin wm.jpg

With the pedestal raised once more it was back to replacing the floor in the rear of the cabin, a jigsaw of sections, hand crafted to fit. The accompanying photo shows the large centre floor section fitted. Removing the last remains of the original rotten plywood was also carried out ready for continuing the manufacturing and fitting of the new floor sections.

Work Day 11th November 2017

Launch Control Post
On the previous running of the simulator it displayed graphic controller (CHARGE) errors on the system monitor (FT81), as a consequence the simulator failed to boot. These were intermittent errors which indicated the usual problem of poor edge/back plane connections between a card connector and chassis connector(s). Saturday started with a connector clean-up which consists using isopropanol to remove any dirt and once that has dried DeOxit Gold is applied to all gold plated contacts. The cards treated this way on Saturday were the PeriBus Serial to Parallel converter, PeriBus terminator and the two installed High Speed Serial interface cards that drive the graphic controllers, all part of the Argus Analogue input/output box. Following the contact cleaning the simulator was run up without any errors, soak tested for an hour and remains serviceable.

Type 86 Radar
Renewing the floor continues apace and this Saturday it was cutting out the floor sections to fit behind the transmitter, under the pedestal. The original plywood floor was bolted through metal cabin floor so before the new floor is laid these badly corroded bolts have to be cut out. Unscrewing the nuts on the underside of the floor is not possible due to corrosion (again).  The image below shows floor bolt removal, Neil gets all the best jobs!

T86 Rear Floor wm.jpg

As seen here a start was also made on removing corrosion from one of the cabin wheels.

T86 Wheel wm.jpg

To fit the floor in the rear section of the cabin we need to raise the pedestal a few inches, it is currently part retracted. The original three phase motor that drove the pedestal retraction mechanism cannot be used, a) we do not have a three phase supply and b) the motor is too badly corroded and is locked solid.

The pedestal gear box can be hand driven up and down, we have the right sized drive socket, courtesy of Dave S, but  in trying to raise the pedestal we experienced drive chain slippage. Looks to be a problem with not enough tension. The chain has tension adjustors so a task for next Saturday.

Work Day 4th November 2017

A team of three set-to on the LCP and T86 cabins on Saturday and more progress was made.

The simulator was also run up for some card testing and its regular serviceability check. After some initial errors from the display system (CHARGE) the simulator settled down and was serviceable. CHARGE errors look to be down to connector cleaning on card edge connectors which will be done next week. We have found that our saviour on many occasions has been Hosa CAIG DeoxIT GOLD Contact Enhancer Spray; expensive but it does get results. Note to ex T86 guys ….  edge connectors are cleaned with the correct fluids and not an eraser which I remember was common practice on the filter bank to such an extent that the gold plated connections on the PCB’s were no longer gold plated!

LCP
The four lifting eyes for the cabin have been refitted after refurbishing. The top edge of the lifting eye has had weatherproof sealant applied to prevent water ingress and hence preventing further corrosion on the inside face of the lifting eyes. See in the accompanying images. All corrosion is treated before any item is refitted.

LCP Lifting Eyes 1wm.jpg

LCP Lifting Eyes 2wm.jpg

T86
Dave and Neil had the trickiest job as they carried on with fabricating a new plywood floor for the T86. The front section of the cabin is now complete and the rear section, under the pedestal, will be tackled next Saturday. The challenge with the flooring is removing the original, corroded, securing bolts and cutting to size to fit the wheel arches, under the console, etc. Images show the removal of the original floor, what was left of it, work in progress and the new floor in place.

T86 Old Floorwm.jpg

T86 New Floor 1wm.jpg

T86 New Floor 2wm.jpg


Work Day 28th October 2017

A good day with four of the team in action.

It was good to see Richard at Cosford again who brought his excellently crafted replica Fuze Aerial, apologies we didn’t take a photo of it. For those not in the ‘know’ this is a real Fuze Aerial on a missile in Switzerland at their museum. Their are four around the missile body. The fuze itself and the warhead were in the bay behind the aerials.

white-missile wm.jpg

It was one of the highest security classified items so they were removed from all UK missiles prior to being scrapped hence you will not see real them on any missile in the UK except for the Aerospace Bristol exhibition that we obtained for them.  You will note that none of the display missiles had them fitted.

As a missile approached its target the radar fuze (a semi-active radar transmitter/receiver made by E.M.I. at Hayes in Middlesex) would detect the presence of a target, evaluate the probable miss distance, check for mis-triggering and, after a brief delay to maximise the probability of destroying the target,  detonate the warhead.

Here is a drawing of a Fuze Aerial

BH 2 Fuze Aerial wm.jpg


—————————————————————————–

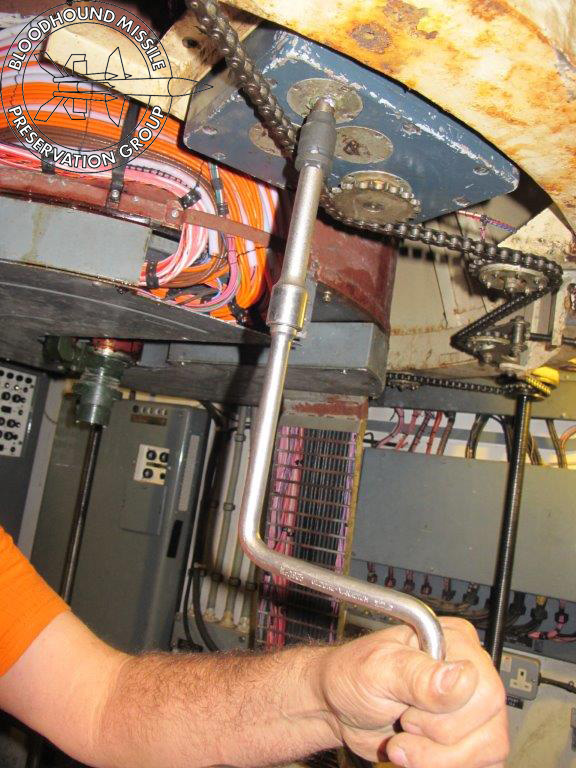
Apart from a run up check of the simulator in the LCP all the effort on Saturday was focused on the T86.

T86 Cabin Roof Preparation

The T86 cabin is in a reasonable condition so the time consuming job of paint removal we carried out on the LCP is not required, much to everyone’s relief. That said, the T86 cabin does require a fair amount of work in preparation for a repaint and a key task was undertaken by Pete M on Saturday; rubbing down the roof and replacing ‘lost’ rivet heads. Over the many years in service and in open storage water has ingressed in and around many of the pop rivet heads used in the cabin’s construction, a particular problem on the cabin roofs. Many pop rivet heads having completely corroded away. All the rivets over two large areas of the T86 cabin roof required replacing a section of one is shown here.

T86 Roof Rivet Replacement wm.jpg

A second photo shows Pete M dressed for the occasion and using an electric sander on the existing paintwork.
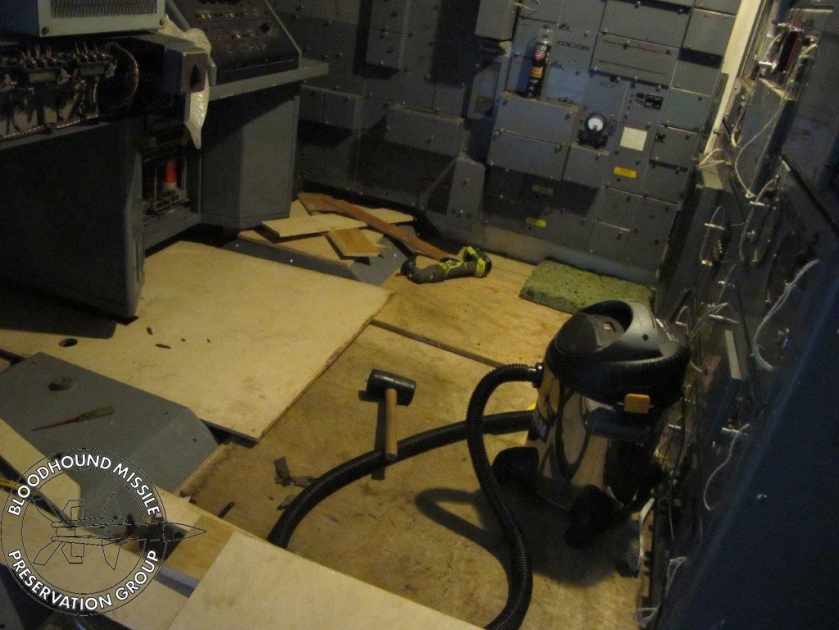
T86 Roof Preping wm.jpg

T86 Cabin Floor
Work continues on the jigsaw of plywood sections needed to cover the cabin floor. It is estimated that two more working sessions will be required before this task is complete. The plywood fitting is only the first task in restoring the cabin floor as the metal floor will need painting, the plywood treating with preservative and finally new vinyl laid.

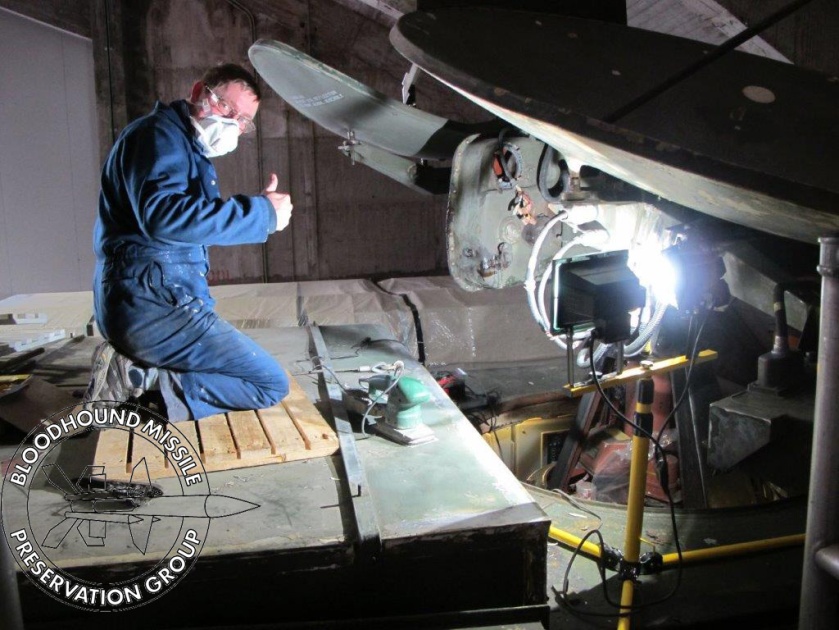
T86 RF Receiver Cover
Richard took on the task of removing all the fittings from the aerial assembly receiver cover and also started to remove several layers of flaking paint. Due to corrosion all screws, nuts, bolts and catches will be replaced as well as the rotten fly screen that can be seen in the accompanying photo.

T86 RF Rx Cover wm.jpg